Details
Battles of Saratoga
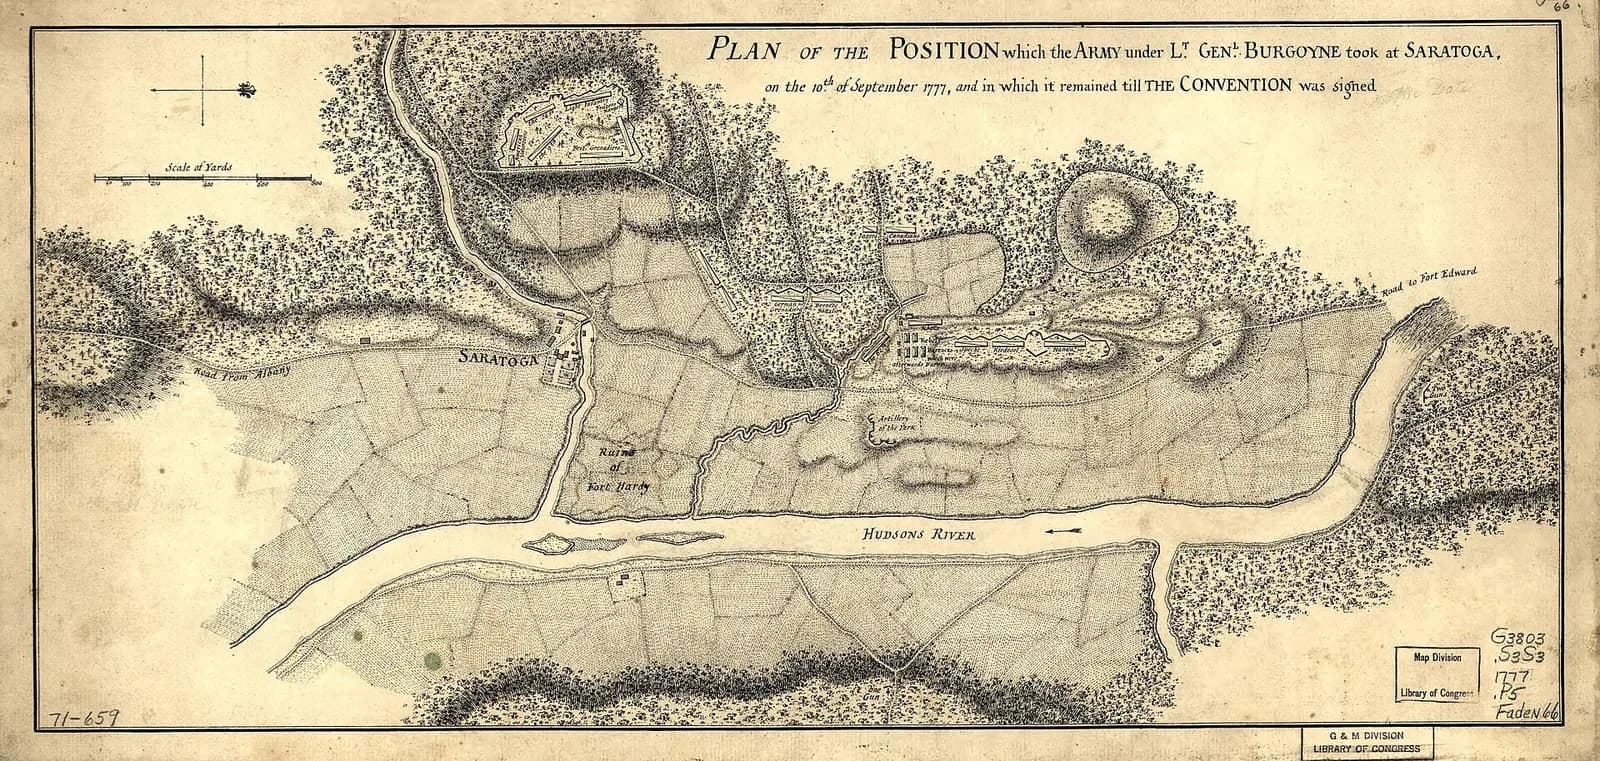
British Army position map, September 10, 1777 — contemporary military document showing Burgoyne's deployment before the decisive battles that ended his northern invasion.
| Battle Details | |
|---|---|
| Date | September 19 and October 7, 1777 |
| Location | Saratoga, New York |
| Belligerents | Continental Army vs British invasion force |
| Result | American victory; Burgoyne's surrender on October 17, 1777 |
| Legacy | |
| Firearms Significance | Saratoga demonstrated the tactical superiority of rifled firearms over smoothbore muskets at scale, with Morgan's Riflemen engaging British troops at ranges where smoothbore muskets were ineffective, proving the rifle's devastating potential in appropriate terrain and hands. |
Battles of Saratoga (1777)
Firearms encyclopedia article
From The Boise Gun Club Handbook
Overviewedit
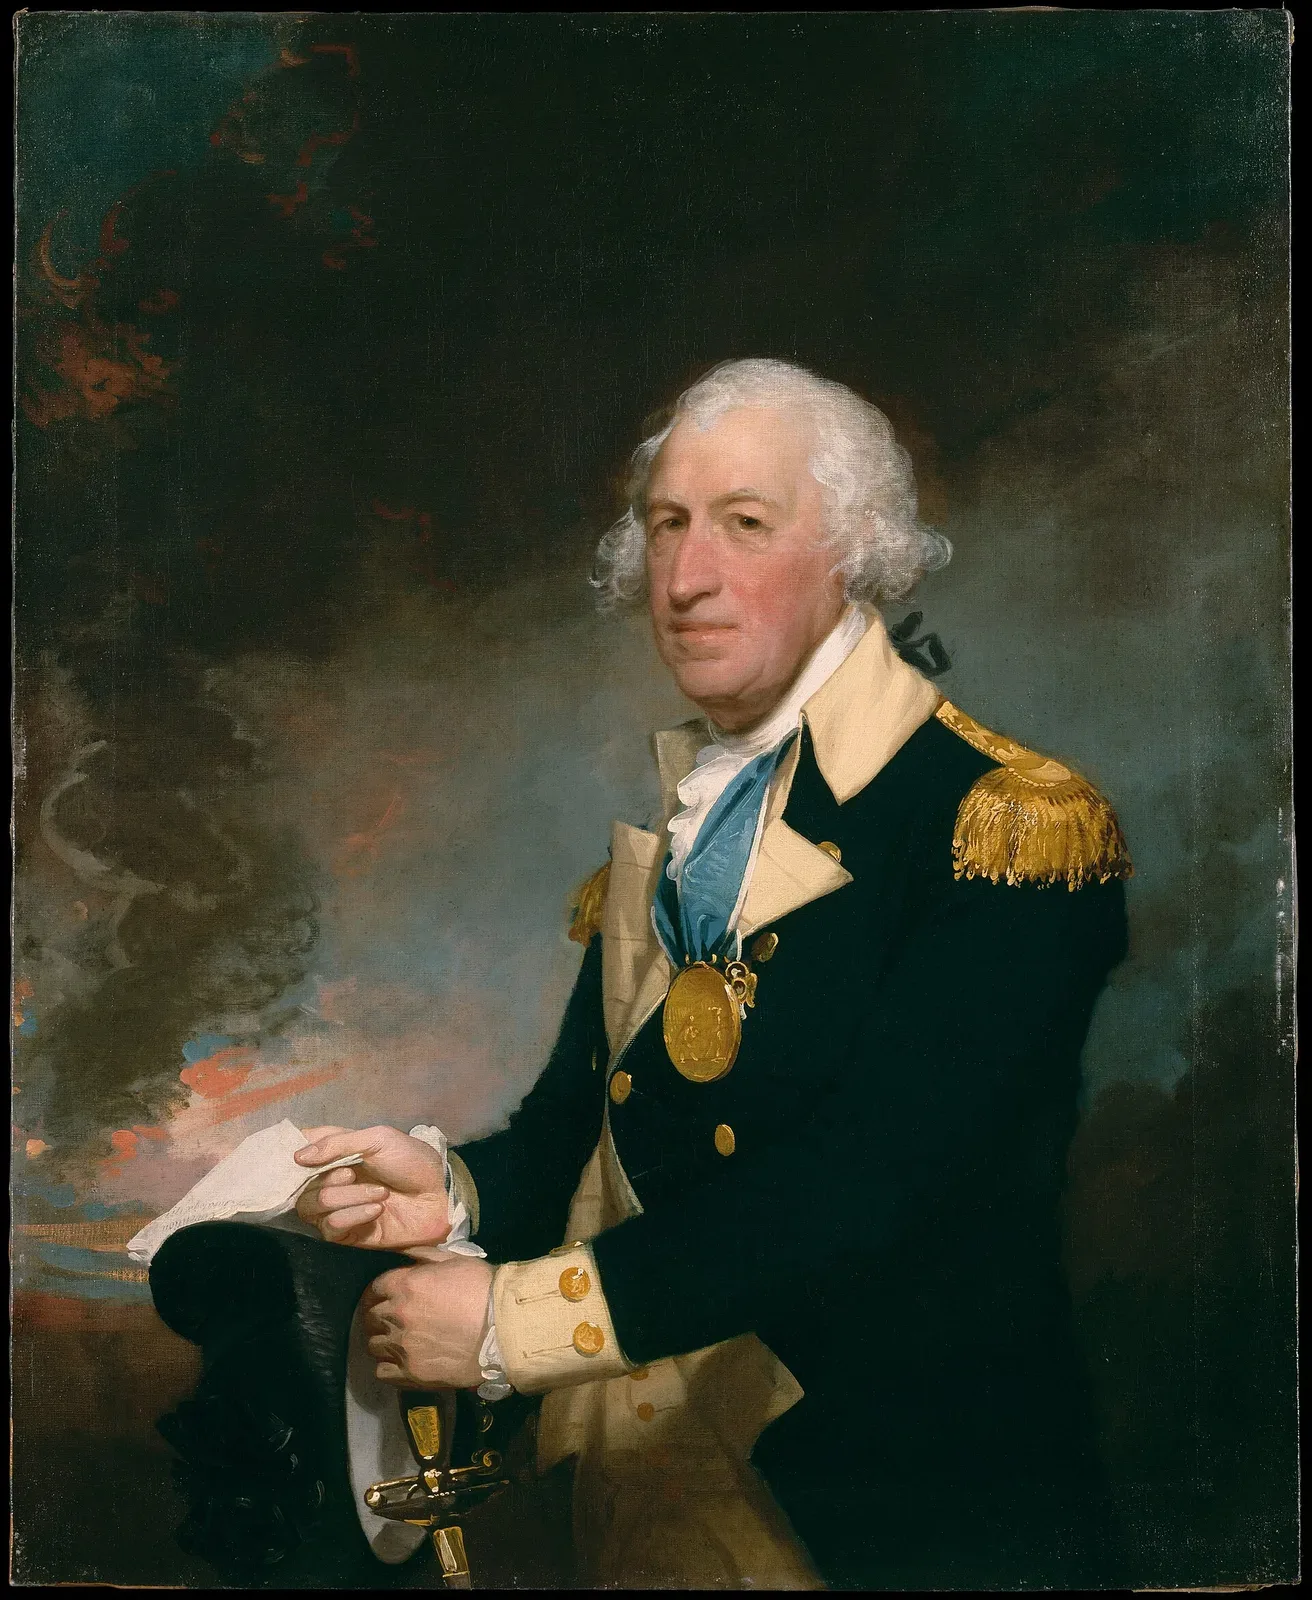
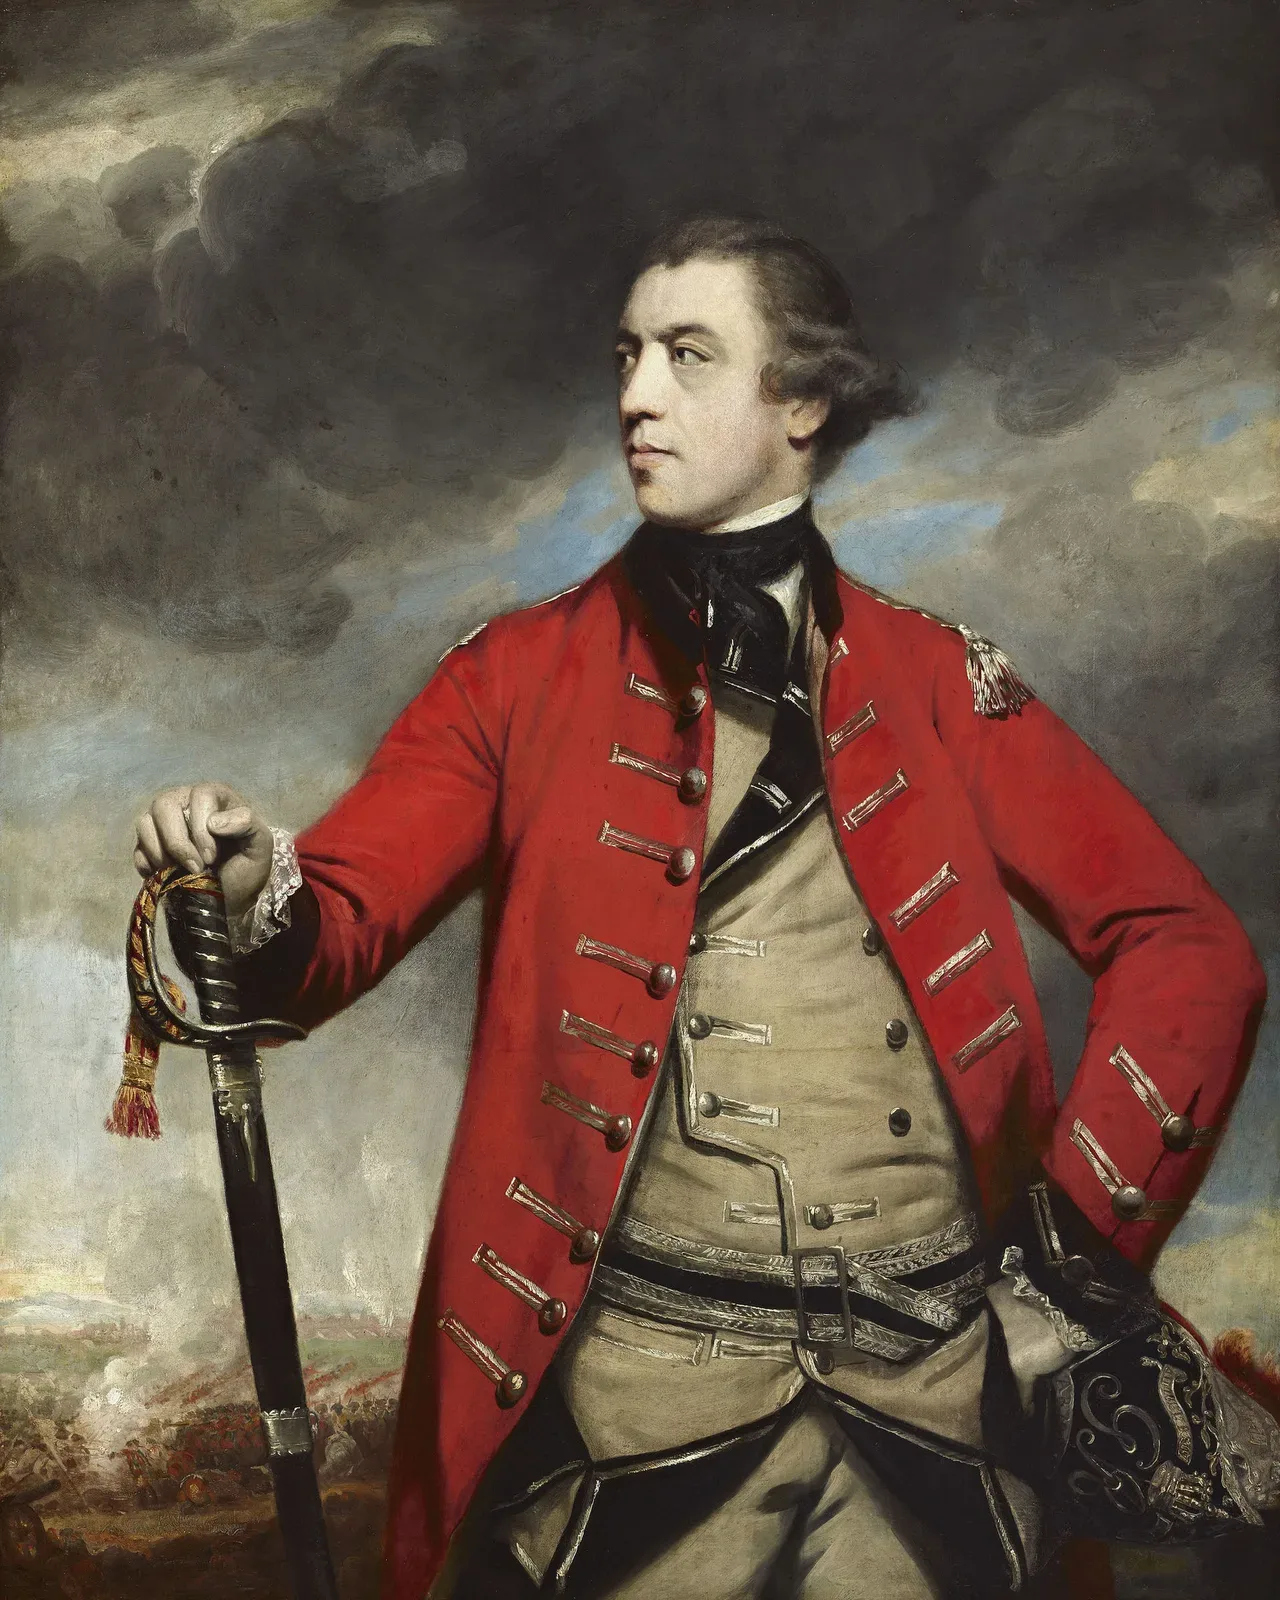
The Battles of Saratoga were fought on September 19 and October 7, 1777, over the same ground near Saratoga, New York, pitting the Continental Army under General Horatio Gates against a British invasion force commanded by General John Burgoyne. The first engagement, the Battle of Freeman's Farm, ended as a technical British victory — Burgoyne held the field. The second, the Battle of Bemis Heights, ended in an American rout of British forces and the eventual surrender of Burgoyne's entire army on October 17.
Saratoga was 'a great turning point of the war' because it secured French military intervention — the last piece the Americans needed. — Edmund Morgan, historian
The strategic consequence dwarfed the tactical details. According to historian Edmund Morgan, Saratoga was "a great turning point of the war" because it secured French military intervention — the last piece the Americans needed. France had been covertly supplying the Continental Army since 1776, including Vallière cannon that saw action at Saratoga itself. After Burgoyne's surrender, King Louis XVI moved from quiet support to formal alliance. On February 6, 1778, French envoys signed accords in Paris recognizing American independence and pledging full military and financial backing. The American Revolution, which had been a colonial insurgency, became a global war Britain could not contain.
Background & Contextedit
By 1777, the British had identified a strategic vulnerability in the rebel position: the Lake Champlain–Hudson River corridor. Control that waterway from Canada to New York City and you sever New England — the rebellion's center of gravity — from the middle and southern colonies. The plan called for a three-pronged convergence on Albany, New York.
Burgoyne would drive south from Canada through the Champlain Valley. Barry St. Leger would push east through the Mohawk Valley from Lake Ontario. William Howe would move north from New York City. The three columns would link up near Albany and effectively cut the colonies in two.
It fell apart before Saratoga was ever fought. St. Leger's expedition stalled at Fort Stanwix and retreated after the Siege of Fort Stanwix failed. Howe, instead of moving north, took his army south by sea to capture Philadelphia — a decision that left Burgoyne completely unsupported. News of St. Leger's failure reached Burgoyne on August 28. His Native American auxiliaries, the force he depended on for reconnaissance and screening, had largely melted away after the Battle of Bennington on August 16, where nearly 1,000 of his men were killed or captured. Blind to American movements and hemorrhaging troops, Burgoyne nonetheless pushed south. Retreat, in his view, was disgraceful. He crossed the Hudson River between September 13 and 15, cutting his own communications northward, and advanced toward what he could not yet see.
The Americans, meanwhile, had been reorganizing under General Philip Schuyler's methodical delaying tactics — felling trees across roads, destroying bridges, driving off livestock, burning crops — that slowed Burgoyne's army to roughly one mile per day after leaving Fort Ticonderoga. On August 19, Horatio Gates assumed command of the Northern Department. He moved the army north to Bemis Heights, a series of bluffs just south of Stillwater where the road to Albany squeezes between the heights and the Hudson River. Polish engineer Tadeusz Kościuszko designed the defensive works. Twenty-two cannon covered both the river road and the adjacent terrain. Burgoyne would have to come through.
George Washington contributed what he could from his own stretched force. He sent his most aggressive field commander, Major General Benedict Arnold, north along with Major General Benjamin Lincoln. More critically, he detached Colonel Daniel Morgan and the newly formed Provisional Rifle Corps — approximately 500 handpicked riflemen from Pennsylvania, Maryland, and Virginia, selected specifically for their sharpshooting ability. This unit became known as Morgan's Riflemen, and their presence would define both battles.
Forces & Weaponsedit
Burgoyne arrived at Saratoga with roughly 7,200 men:
- British regulars and Hessian auxiliary troops
- Loyalist Americans and Canadian militia
- Shrinking Native American contingent
- Substantial artillery train including Vallière cannon
Gates opened the first battle with approximately 9,000 men; by the second battle, American strength had grown to more than 12,000, swelled by militia responding to calls from state governors, outrage over the killing of Jane McCrea by Native Americans under Burgoyne's command, and the momentum of earlier American successes.
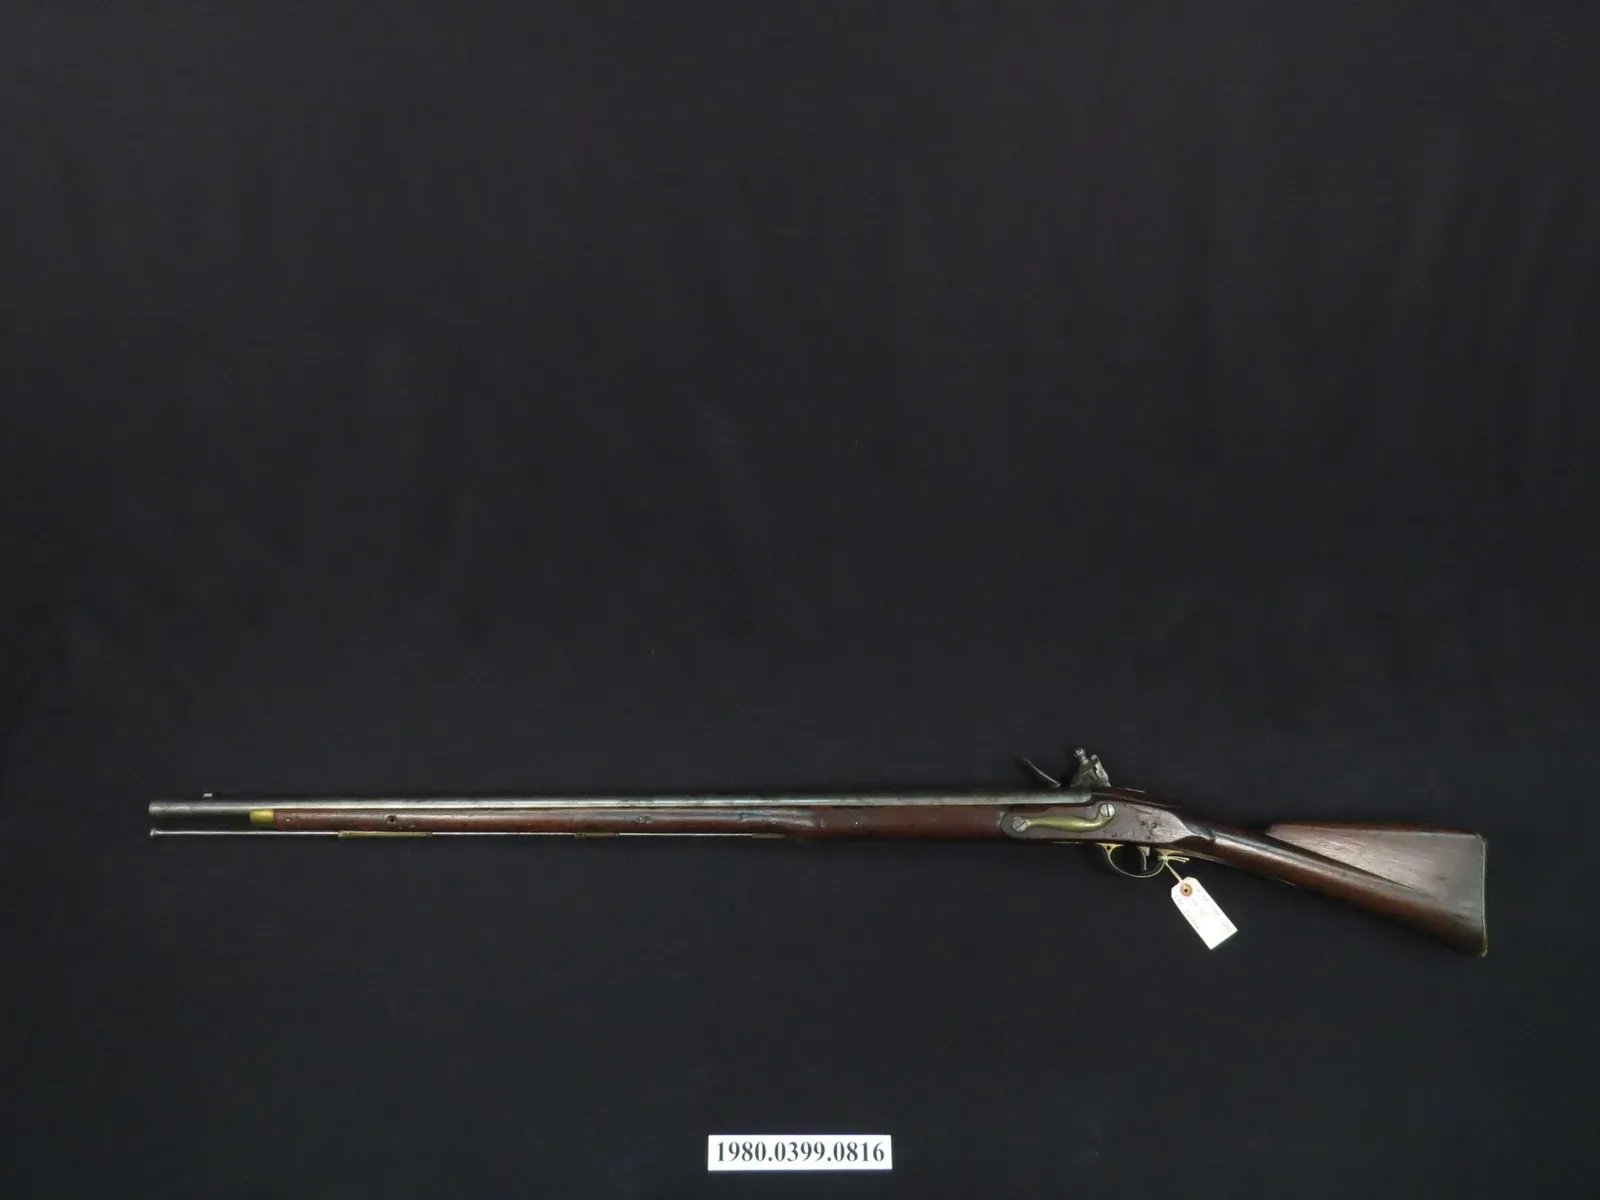
The weapons gap between the two sides is central to understanding both battles. The standard infantry arm on both sides was the smoothbore musket. A British colonel writing in 1814 put its effective range bluntly: reliable against a man-sized target at 80 yards, marginal at 100, and essentially useless beyond 150. The loose-fitting ball and unrifled barrel saw to that. Tactically, this forced commanders to mass troops in shoulder-to-shoulder lines, advance to within 100 yards of the enemy, and deliver massed volleys — the weight of fire compensating for the inaccuracy of any individual shot. A well-trained regiment could fire three volleys per minute. Exchanges continued until one side broke or a bayonet charge ended it.
| Weapon Type | Effective Range | Rate of Fire | Advantages | Disadvantages |
|---|---|---|---|---|
| Brown Bess Musket | 80-100 yards | 3 rounds/min | Fast reload, bayonet compatible, mass production | Poor accuracy, short range |
| American Long Rifle | 200-300 yards | 1 round/2 min | High accuracy, long range | Slow reload, no bayonet, expensive |
| Vallière Cannon | 1000+ yards | 1-2 rounds/min | Area effect, psychological impact | Heavy, crew vulnerable to rifles |
The rifle operated on entirely different principles. A spiral groove cut into the barrel imparted spin to a tight-fitting ball, dramatically improving accuracy at longer ranges. Morgan's riflemen could engage effectively at distances that left smoothbore troops unable to respond. The NPS sources document an illustrative incident from the approach to Fort Ticonderoga in June 1777: 3,000 American soldiers fired at a single British soldier at 100 yards and wounded only two men — a demonstration of what massed musket fire actually produced at that range. At Saratoga, Morgan's men operated at ranges where the arithmetic was reversed.
The rifle's tactical advantages came with hard limitations. It took a good rifleman one to two minutes to reload, versus the musket's three rounds per minute. The rifle could not mount a bayonet, making its user defenseless in a charge. And rifles were expensive to produce, which is why the Provisional Rifle Corps numbered only around 500 men in an army that eventually exceeded 12,000. The rifle was a specialist weapon — devastating in the right terrain and the right hands, irrelevant in a close-quarters melee. Saratoga was the terrain and the hands it needed.
France's covert supply pipeline had already delivered material that mattered. According to Wikipedia's sourcing, French supplies, ammunition, and guns — specifically including Vallière cannon — played an important role in the Saratoga campaign. The Americans were not fighting with improvised hardware by the time Burgoyne crossed the Hudson.
The Battleedit
Freeman's Farm — September 19, 1777
Burgoyne advanced in three columns on the morning of September 19. Baron Riedesel led the left column of German troops and the 47th Foot along the river road, bringing the main artillery train. General James Inglis Hamilton commanded the center column — the 20th, 21st, and 62nd Regiments — tasked with attacking the heights directly. General Simon Fraser led the right column with the 24th Regiment and the light infantry and grenadier companies, intending to flank the American left through the heavily wooded high ground.
Arnold read the flanking maneuver coming and pushed Gates to allow him to move forces out from the heights to meet the British in the woods, where American woodland fighting skills would matter. Gates, preferring to sit in prepared defenses and wait for a frontal assault, grudgingly authorized a reconnaissance in force: Morgan's riflemen and Henry Dearborn's light infantry.
Around 12:30 p.m., Morgan's men encountered the advance company of Hamilton's center column in the open clearing of John Freeman's farm, about a mile north of the American line. Morgan placed marksmen at elevated positions and they picked off virtually every officer in the advance company. Morgan's men then charged — straight into Burgoyne's main army, which they had not known was there. Fraser's leading edge arrived in time to attack Morgan's exposed left flank, scattering his riflemen into the woods.
What followed was three hours of grinding, phase-by-phase fighting across Freeman's Farm. The British formed Hamilton's regiments in line — 21st on the right, 20th on the left, 62nd in the center, 9th in reserve. Morgan's men had regrouped in the treeline and worked systematically: picking off artillerymen until the Americans briefly seized British field pieces, only to lose them in the next British charge. The 62nd Regiment in the British center was reduced to the size of a single company. Three-quarters of the British artillerymen were killed or wounded. A British soldier named Roger Lamb, present at the battle, later wrote that "an unusual number of officers fell" — three subalterns of the 20th Regiment were buried together, the oldest not yet seventeen years old.
The final stroke belonged to the British only because Riedesel made a calculated gamble. He left 500 men guarding the supply train, marched the rest of his column toward the sound of fighting, and arrived around dusk to open vicious fire on the American right. Fraser's force simultaneously threatened the American left. Darkness ended the fighting before Arnold — who historians still debate was either directing the action from Gates's headquarters or present on the field — could concentrate against Riedesel's threat. The Americans withdrew to their defenses.
Burgoyne held the field but had suffered nearly 600 casualties, including three-quarters of his artillerymen. American losses were close to 300 killed and seriously wounded. The British did not pursue. Burgoyne ordered his men to entrench near Freeman's Farm and wait for Clinton to arrive from New York City.
Clinton never came. He sailed from New York on October 3 and captured Forts Clinton and Montgomery in the Hudson Highlands on October 6 — too little, too far south, too late. The furthest north any of his troops reached was Clermont, where they raided the Livingston estate on October 16, the day before Burgoyne surrendered.
While Burgoyne waited, the American camp grew. Militia poured in. Ammunition resupply, critically depleted in the first battle, arrived. By early October, Gates commanded more than 12,000 men. Burgoyne had perhaps 5,000 effective troops after losses and desertions. He put his army on half-rations on October 3.
Bemis Heights — October 7, 1777
On October 7, Burgoyne sent a reconnaissance force of roughly 1,500 to 1,700 men to probe the American left flank and assess whether artillery could be positioned on the heights to the west. The force moved about three-quarters of a mile to Barber's wheatfield on a rise above Mill Brook, where they stopped to observe. Eight British cannon under Major Williams and two Hesse-Hanau cannon under Captain Pausch deployed in the field. Both flanks rested uncomfortably close to surrounding woods.
Gates received word of the movement and sent Morgan's riflemen to the far American left, Enoch Poor's brigade to the left, New York regiments to the right, and Ebenezer Learned's brigade plus militia to the center. A reserve of 1,200 New York militia under Brigadier General Abraham Ten Broeck waited behind Learned's line. More than 8,000 Americans took the field.
The British grenadiers opened fire between 2:00 and 2:30 p.m. Poor's men held their fire. When Major Acland led the grenadiers in a bayonet charge, the Americans finally fired — at close range. Acland fell, shot in both legs. The grenadier column routed. Poor's men advanced to take Acland and Major Williams prisoner and capture their artillery.
On the American left, Morgan's men swept aside the Canadian and Native American screening force and engaged Fraser's regulars. Fraser, mortally wounded while riding among his men to steady the withdrawal — though the source notes that the frequently told story attributing the shot to Morgan's rifleman Timothy Murphy may be a 19th-century fabrication — fell from his horse. Ten Broeck's large militia brigade then arrived, roughly equaling the entire British reconnaissance force in size, and the British will broke. Burgoyne was himself nearly killed — three shots struck his horse, his hat, and his waistcoat. Within about one hour, the British had lost eight of their ten field pieces and more than 400 men.
| Battle | Date | British Casualties | American Casualties | Key Outcome |
|---|---|---|---|---|
| Freeman's Farm | Sept 19, 1777 | ~600 (including 75% of artillery crews) | ~300 | British tactical victory, strategic stalemate |
| Bemis Heights | Oct 7, 1777 | ~400 + 8 of 10 cannon lost | Minimal | American victory, British retreat |
| Surrender | Oct 17, 1777 | ~6,000 captured | - | Complete American strategic victory |
What happened next complicated American history for centuries. Benedict Arnold — stripped of his command after his post-Freeman's Farm argument with Gates, confined to camp, and by some accounts drinking — rode out onto the field without orders. Gates immediately sent Major Armstrong after him with orders to return; Armstrong did not catch up with Arnold until the action was effectively over. A letter from a witness does suggest Arnold may have had some authorization from Gates, though the historical record is contested.
Arnold first led Poor's men in repeated assaults on the Balcarres Redoubt, a log-and-earthen fortification roughly 500 yards long and 12 to 14 feet high on Freeman's Farm. The redoubt held. Arnold then rode — through the crossfire of both armies, somehow unhurt — to where Learned's brigade was preparing to assault the Breymann Redoubt, a single line of breastworks about 200 yards long and 7 to 8 feet high defended by roughly 200 to 300 German troops under Heinrich von Breymann. Arnold led the charge through the gap between the two redoubts, which exposed Breymann's rear to Morgan's men who had circled from the far side. Breymann's Redoubt fell. Breymann was killed. Arnold's horse was hit in the final volleys and went down on him, breaking his leg.
The capture of Breymann's Redoubt breached the British camp. Darkness prevented the Americans from exploiting it fully, but Burgoyne's position was finished. That night he lit fires at his forward positions and withdrew under cover of darkness. By the morning of October 8 he was back where he'd been on September 16, before either battle.
Surrender
Burgoyne tried to retreat north toward Ticonderoga, but the roads were wrecked by rain and his army was exhausted. In two days of marching he covered eight to ten miles — to the present-day site of Schuylerville, New York. American forces had grown to nearly 20,000 by some estimates, surrounding Burgoyne on every side. New Hampshire and Vermont militia cut off the eastern crossing of the Hudson. Massachusetts militia blocked the road north. There was nowhere to go.
On October 13, Burgoyne called a council of war and proposed terms. After several days of negotiation, both sides signed the capitulation. On October 17, 1777, Burgoyne's army — approximately 6,000 men — marched out of camp with the honors of war, regimental colors flying and bands playing, and stacked their arms along the west bank of the Hudson. Burgoyne surrendered to Gates, who declined to take his sword. The Continental Congress subsequently revoked the convention terms and the Convention Army, as the captured force was called, remained in captivity for the duration of the war rather than returning to Europe as originally agreed.
British losses across the campaign totaled more than 1,000 killed and wounded in the two battles, plus the 6,000-plus captured at surrender. American casualties across the three weeks of fighting numbered fewer than 500.
Firearms Significanceedit
Saratoga sits at a hinge point in the long story of firearms development — not because anything new was invented there, but because the tactical gap between the rifle and the musket was demonstrated at a scale and in circumstances the world was watching.
The smoothbore musket in 1777 was the product of roughly three centuries of military refinement. The flintlock mechanism had largely displaced the matchlock and wheellock by the early 18th century, offering more reliable ignition in field conditions. But the fundamental limitation — a loose ball in an ungrooved barrel producing wildly unpredictable flight — remained. European armies had built their tactics entirely around this limitation. Mass formations, tight intervals, close-range volleys, bayonet charges: all of it was engineering around a weapon that couldn't hit a man reliably past 100 yards. The Brown Bess musket carried by British regulars at Saratoga was a mature, battle-proven arm that the system of warfare had been designed to use. Within that system, it worked.
The rifle — specifically the American long rifle developed in Pennsylvania and the backcountry colonies, sometimes called the Kentucky rifle — represented a different design philosophy. Tight-fitting ball, rifled bore, longer barrel: the physics of the spinning projectile gave it genuine accuracy at two to three times the effective range of the musket. Morgan's riflemen could engage British officers and artillerymen at distances where return fire was nearly pointless. At Freeman's Farm, this asymmetry produced an almost complete destruction of Hamilton's artillery crews — three-quarters killed or wounded — and the systematic elimination of officers that Roger Lamb's memoir described with something close to disbelief.
In broken, wooded terrain against an enemy with long rifles, European linear tactics became a killing field for the side following them.
The tactical lesson was stark: in broken, wooded terrain against an enemy with long rifles, European linear tactics were a killing field for the side following them. The British could win Freeman's Farm because they had artillery and Riedesel's relief column and eventually the cover of darkness. They could not fix the underlying problem that Morgan's men were engaging them from ranges at which their own muskets were impotent.
The rifle's limitations remained real — one to two minutes to reload versus three musket volleys per minute, no bayonet, expensive to produce — and these kept it a specialist arm for the entire war and well beyond. The answer to the rifle's slow reload rate that would eventually emerge, the rifled musket with a Minié ball that could be loaded nearly as fast as a smoothbore, was still eighty years away. The Springfield Model 1861 and its Confederate equivalents in the Civil War would finally make the rifled barrel the standard infantry arm, and would break the Napoleonic tactics that had evolved from exactly the smoothbore-musket logic on display at Saratoga.
France's role in the firearms picture at Saratoga is worth noting. According to the Wikipedia source, France had been clandestinely providing "supplies, ammunition, and guns" before the battles, specifically including Vallière cannon that played an important role in the campaign. The Vallière system, standardized by French artillerist Jean-Florent de Vallière in 1732, represented a rationalization of French field artillery around a set of standardized calibers and bronze construction. American access to French artillery materiel was not incidental to the outcome — it was part of why the American defensive position at Bemis Heights was tenable at all.
The strategic consequence of Saratoga also accelerated the flow of French military technology to the Continental Army. After the Treaty of Alliance in February 1778, American forces gained access to French arms, French naval support, and ultimately French troops — the combination that made Battle of Yorktown possible in 1781. The firearms and artillery that French support provided were not abstract; they were the physical infrastructure of the final American victory.
Beyond the immediate campaign, Saratoga's demonstration that American forces — a mix of Continental regulars and citizen militia — could defeat and capture an entire professional European army had implications that outlasted the war. The Battle of Bunker Hill in 1775 had suggested Americans could fight. Saratoga proved they could win campaigns. That proof was what Louis XVI needed to see, and what changed the war from a colonial rebellion into a global conflict Britain was forced to fight on multiple fronts simultaneously.
The BGC Takeedit
The following is opinion, clearly labeled as such.
The firearms nerd's argument about Saratoga usually centers on Morgan's Riflemen, and it's not wrong — but it can obscure the bigger picture if you let it. The rifle didn't win Saratoga. Position won Saratoga. Kościuszko picked ground that forced Burgoyne to fight where American advantages were maximized, and that decision made everything else possible. The rifle was the multiplier, not the cause.
What Morgan's Riflemen actually demonstrated was something the military world took another eighty years to fully absorb: that accuracy at range fundamentally changes what officers and artillerymen can risk doing. When your gun crews are being dropped at 200 yards by men you can't effectively return fire on, your artillery stops working as advertised. When your officers become priority targets at distances where the enemy is effectively safe from your volleys, command and control degrades fast. The 62nd Regiment reduced to company size at Freeman's Farm wasn't beaten by a more powerful army. It was beaten by a force that was shooting from a different range envelope altogether.
The irony is that the British had access to rifled arms too — German jäger units carried rifles throughout the war. What they didn't have at Saratoga was 500 of their best shots organized into a dedicated harassment and interdiction unit under a commander who understood exactly how to use them in that specific terrain. That's not a hardware problem. That's a doctrine problem. And doctrine problems tend to be slower to fix than hardware problems.
Arnold complicates everything, as Arnold always does. The man quite possibly changed the outcome of the second battle through sheer reckless aggression while technically acting without orders. His later treason has distorted how history remembers his military record, but the Boot Monument at Saratoga — depicting just his boot and spurs, no name — captures the paradox as well as any monument can. The leg that won the battle, and the man who owned it, ended up on opposite sides of history.
For the scrollytelling page this article supports: Saratoga is the moment the rifle's tactical potential collides with geopolitical consequences. The technology on that field in September and October of 1777 was not new. The demonstration of what it could do, in front of a watching world that included France's diplomatic corps, was.
Referencesedit
- https://en.wikipedia.org/wiki/Battles_of_Saratoga
- https://www.battlefields.org/learn/revolutionary-war/battles/saratoga
- https://www.nps.gov/articles/saratoga-the-tide-turns-on-the-frontier-teaching-with-historic-places.htm
- https://www.saratoga.org/battle-of-saratoga/
- https://www.history.com/articles/american-revolution-history
- https://www.mountvernon.org/library/digitalhistory/digital-encyclopedia/article/battle-of-saratoga
Last Updated: February 27, 2026
- Gls Guns(Sumner, IA)
- Bi-mart - Yakima (Fruitvale Ave)(Yakima, WA)
- New Philly Sportsman Specialities(New Philadelphia, OH)
- R&R Sports & Outdoors(Brandon, FL)
Loading comments...